@Res() res: Response: nếu thêm mà ko dùng thì nest sẽ hiểu bạn đang dùng library-specific mode
={red}whitelist= = true, Tự động xóa fields không có trong DTO: https://docs.nestjs.com/techniques/validation ⇒ ko lưu các field ko validate vào database.
Ví dụ: có 3 field: id, name, phone. Mà chỉ có 2 field id, name được validate decode thì trường phone sẽ ko update vào database.
còn ={red}forbidNonWhitelisted= = true, khi response trả về sẽ thông báo cho người dùng những field đang chưa được validate.
cấu trúc typescript
={red}constructor(private catsService: CatsService) {}=
vừa bơm injection vừa giúp khởi tạo CatsService
lệnh : ={red}nest g resource auth —no-spec= giúp tạo module
={red}@Public()= : đánh dấu router api này ko cần token
provide như kiểu bạn muuốn xe gì, useClass tôi cần xe honda
Set global app(#### Enable authentication globally: https://docs.nestjs.com/recipes/passport#implementing-passport-local)

{
provide: APP_GUARD,
useClass: JwtAuthGuard,
},
cách trên là cách set global app, còn cách 2 là cách set theo từng router:
@Post('profile')
@UseGuards(JwtAuthGuard) // dùng cái này

getProfile(@Request() req) {
 return { profile: req.user };
}
Flow dùng passport:
Request
↓
1️⃣ ={red}>canActivate=(context) -={red} LUÔN được gọi nhưng có thể ko cần implement dùng mặc định =
↓
├─ Custom logic (check @Public(), roles, etc.)
│ ├─ return true → STOP (bypass authentication)
│ └─ return false → STOP (reject request)
│
└─ super.={red}>canActivate=(context) → Gọi Passport AuthGuard
↓
2️⃣ Extract credentials (token, username/password, etc.)
↓
3️⃣ Verify credentials
↓
4️⃣ Strategy.validate() - Transform payload to user
↓
5️⃣ handleRequest(err, user, info) - ĐƯỢC GỌI Ở ĐÂY (={red}hàm này có thể gọi hoặc không nhưng chú ý là nếu hàm canActive được gọi thì hàm này sẽ được gọi)=
 ↓
 6️⃣ req.user = user
 ↓
Route Handler
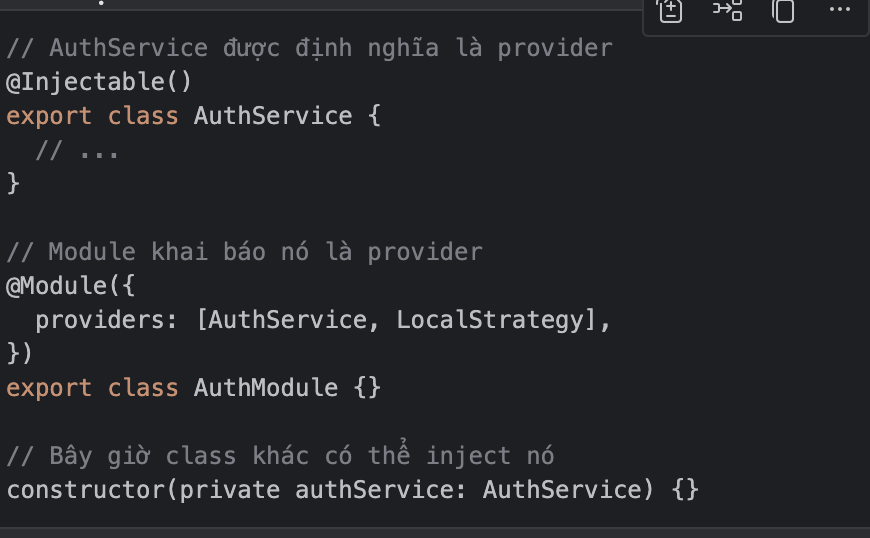
={yellow}@Injectable=: được hiểu là 1 decoderator khiến nest.js hiểu rằng class này sẽ được quản lý IOC container giúp cho ở 1 class ko cần khởi tạo class đươc khai bao với từ khoá này
chỉ cần viết:
={red}constructor(private catsService: CatsService) {}=
- @Controller() = đây là controller → tự động là provider → có thể inject service vào.
@Injectable()= đây là service/provider → có thể inject vào controller hoặc service khác.
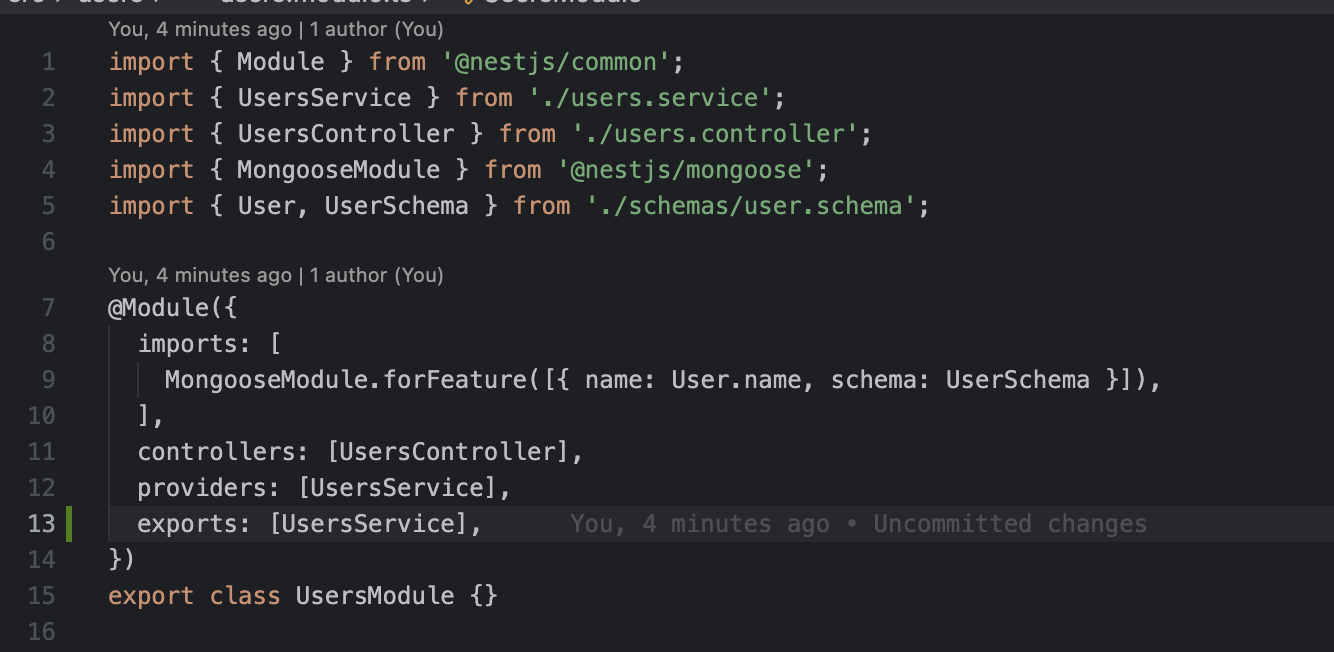
~={red}>UsersModule.imports =~→ MongooseModule.forFeature([…])
↓
khai báo model User này được sử dụng trong module UsersModule,
ví dụ module khác mà muốn sử dụng model User thì ={red}ta export UsersModule để module khác sử dụng chứ ko khai báo lại một lần nữa MongooseModule.forFeature([…])=
↓
={red}>UsersService.constructor= → @InjectModel(User.name)
↓
Lấy model User từ container, tiêm vào UsersService
↓
={red}>UsersController.constructor= → inject UsersService
↓
Controller dùng Service, Service dùng Model để query DB
={red}
Pipe
= Pipe: muốn validate cho các thuộc tính của class DTO ta sẽ dùng thằng pipe để validate các param từ request gửi lên trước khi mình handle logic gọi hàm service Tác dụng thứ 2: convert kiểu dữ liệuChú ý muốn sử dụng lib: class-validator thì phải config thêm ở main.ts đoạn code:
app.useGlobalPipes(new ValidationPipe());
={red}Cần học kĩ chương này=
={red}
Passport
= Nếu một module sử dụng 1 module khác cần phải import Modules đấy vào :import { Module } from '@nestjs/common';
import { AuthService } from './auth.service';
import { UsersModule } from 'src/users/users.module';
@Module({
providers: [AuthService],
imports: [UsersModule], // import module này vào
})
export class AuthModule {}
tiếp đến thằng userService được sử dụng ở auth service thì cần export thằng UserService ra để thằng khác sử dụng
={red}
Guard
= là một middleware (người bảo vệ ), can thiệp req ⇒ guard ⇒ response check return false: trả về lỗi check return true: đi tiếp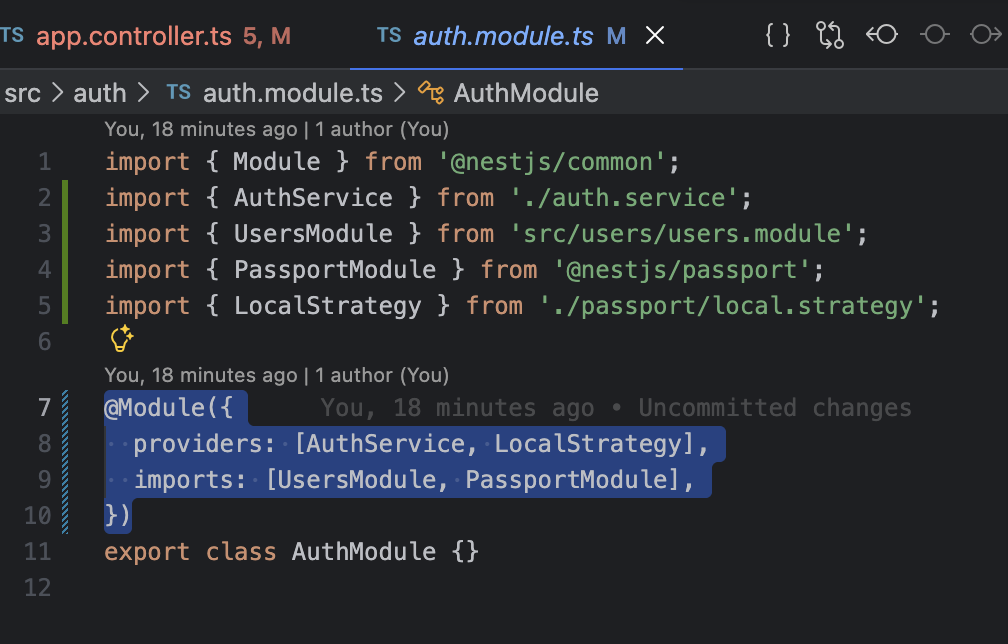 giải thích :
={yellow}https://www.npmjs.com/package/api-query-params và REF=
Ref: được định nghĩa trong schema để nói cho moongo database rằng cần lần bảng nào trong database.
Trong thư viện này có 2 field rất quan trọng : (Xem ví dụ role.serveice)
-
nếu api truyền populate: thì lấy dữ liệu collection liên kết thì ở moongo sẽ dùng lệnh .populate để lấy dữ liệu collection
return await this.roleModel.findById(id).populate({ path: 'permissions', select: { _id: 1, apiPath: 1, name: 1, method: 1 }, // 1 là thêm trường này // -1 là bỏ trường này đi }); -
nếu api truyền fields: thì ở code là trường projection: giúp chọn trườnh nào được trả về , trường nào ko trả về .